Last updated October 15, 2026







Free written scope consultation - allowances, timeline, and change-order rules on paper before a single trade is scheduled
General Contractor Maintenance Checklist for Jacksonville Homeowners
The most expensive Jacksonville repair calls contractors receive share one trait: they were detectable 12 to 18 months earlier by a homeowner who knew exactly where to look and what to feel for. Slab leaks, mold behind shower tile, and fascia rot don’t announce themselves with a crash. They develop quietly, behind walls and under floors, and by the time you see the stain on the ceiling or the soft spot in the drywall, the repair has already tripled in cost. This guide is built for Jacksonville’s actual climate, not a generic national list. You’ll learn what to check each month, where water hides in block construction, which caulk joints fail first in our UV, and how to build a dated record that protects the value of your home.
Styles & brands we work with





Quick Answer
A Jacksonville home maintenance checklist should follow the city’s real seasons: pre-June hurricane and storm prep, an August humidity peak inspection, a November cold-weather caulk and seal check, and a February irrigation restart. The items that matter most in Jacksonville are the ones that fail silently: weep hole blockages in stucco walls, soffit-to-ridge attic ventilation gaps, slab-adjacent plumbing joints, and exterior caulk joints exposed to intense UV and driving rain. A walkthrough every 90 days, with dated photos and product names written down, prevents most six-figure repair scenarios before they start.
Table of Contents
- January & February: Cold Snaps and the Irrigation Restart
- March & April: Pollen Season and the First Humidity Test
- May & June: Pre-Storm Prep and the Attic Ventilation Check
- July & August: Humidity Peak and Hidden Mold Detection
- September & October: Post-Storm Assessment and Exterior Caulk
- November & December: The Cold-Weather Caulk Check and Winter Dry Air
- Block Construction Inspection Points Unique to Jacksonville
- What a Contractor Should Document on Every Visit
- Common Mistakes to Avoid
- When to Call a Professional
- Frequently Asked Questions
- The Bottom Line
January & February: Cold Snaps and the Irrigation Restart
Jacksonville gets a genuine cold snap most winters, usually two or three nights where temperatures drop into the low 30s or upper 20s. That’s enough to pop shallow PVC irrigation lines, crack exterior hose bibs, and stress caulk joints that were already weakening from summer sun. In our experience, February is when we see the most preventable irrigation repairs in Jacksonville. The sequence below takes about an hour and catches most of them.
January Checklist
- Inspect every exterior hose bib. Turn it on briefly with your thumb over the opening. If water sprays from the wall behind the bib, the frost-free portion has split and it’s leaking inside the wall cavity. Shut it off at the interior valve and schedule a repair.
- Check attic insulation for cold-spot evidence. On a cold morning before the sun hits the roof, look for areas where attic insulation is matted down or discolored. These cold spots correspond to air leaks from the living space below and they’re the first places condensation forms when warm air rises.
- Note any hairline cracks in exterior stucco. Cold snaps and warm afternoons expand and contract stucco. Mark cracks with painter’s tape and check again in three weeks. If they’ve widened, water is getting in.
- Run every bathroom exhaust fan for five minutes. If the fan rattles or the air doesn’t feel like it’s moving, the damper at the roof or wall cap may be stuck open from debris. A stuck damper lets cold air drop into the bathroom and pulls conditioned air out all winter.
February Irrigation Restart
By mid-February, Jacksonville’s freeze risk is mostly passed and it’s time to wake the irrigation system. Run each zone manually and look for:
- Bubbling water in the lawn that indicates a cracked lateral line below grade.
- Spray heads that are tilted, clogged, or watering the sidewalk instead of the grass.
- Water pressure that drops noticeably in the last zones, which suggests a leak bleeding pressure from the entire loop.
- A zone that runs but produces no water at all, typically a sheared gear inside the head from a freeze-thaw cycle.
If you find a leak, mark the spot with a landscape flag. A plumber or irrigation contractor can locate it precisely without tearing up the whole yard. Jacksonville’s sandy soil erodes quickly around underground leaks, and what starts as a small drip can undercut a walkway within a year. This is also the right time to pull out any dead plant material from the fall so it doesn’t sit against the foundation and hold moisture through the wet spring.
March & April: Pollen Season and the First Humidity Test
Jacksonville’s oak and pine pollen peaks in late March and early April, and it’s more than an allergy problem. Pollen is abrasive. It clogs AC condensate drains, coats evaporator coils, and blocks soffit vents. The first real humidity of the year usually arrives with April afternoon showers, and that’s when a clogged drain line or blocked soffit stops being a nuisance and starts being a water problem.
AC System Preparation
- Check the primary condensate drain line. Find the drain opening at the indoor air handler. If you see standing water or a dark stain, the line is partially blocked. Pour one cup of white vinegar down the line, wait 20 minutes, then flush with a gallon of warm water.
- Find the emergency drain pan overflow. This is a secondary drain, usually a short PVC stub outside near the foundation. If it’s wet when the AC hasn’t been running heavily, the primary line is clogged and water is already backing up.
- Replace the air filter. During pollen season in Jacksonville, a pleated MERV-8 filter should be changed every 30 days. A coated filter drops airflow across the coil, which drops the evaporator temperature, which causes ice, which causes water where water doesn’t belong.
Exterior Walkaround After Rain
After the first heavy April rain, walk the entire perimeter of the house. Look for water standing against the foundation for more than 30 minutes after the rain stops. In Jacksonville’s sandy loam, water should disappear quickly unless a downspout is dumping too close to the slab, a flower bed is graded toward the house, or a French drain has silted over. Reposition downspouts with splash blocks or flexible extensions so they discharge at least six feet from the foundation. Check crawl space vents, if your home has them, for leaf litter and pollen accumulation that blocks airflow and feeds mold in the humid months ahead.
May & June: Pre-Storm Prep and the Attic Ventilation Check
June 1 starts hurricane season, but the prep should happen in May when the weather is still mild enough to work in the attic. Jacksonville’s wind-driven rain is a different animal than a steady shower. It pushes water sideways, and it finds entry points that normal rain never tests. This section covers storm prep and one inspection point most homeowners never think about: attic ventilation adequacy.
Storm Prep Checklist
- Check all window and door weatherstripping. Run your hand around the perimeter of every exterior door and window. Gaps larger than the thickness of a nickel let wind-driven rain enter. Replace worn weatherstripping now, not in August when a storm is three days out.
- Inspect roof edge flashing. From the ground with binoculars or from a ladder if you’re comfortable, look at the drip edge where the roof meets the fascia. Lifted or missing drip edge lets rain run behind the gutter and into the fascia board. Fascia rot in Jacksonville almost always starts at a failed drip edge or a clogged gutter.
- Clear gutters and downspouts. Do this twice: once after the spring pollen drop, once in early June. A clogged gutter overflows against the fascia and the soffit, and that water finds its way into the wall cavity and the attic.
- Secure or store loose yard items. Anything that can become airborne in tropical storm force winds should be moved into the garage or anchored: patio cushions, potted plants, yard tools, garbage bins.
The Attic Ventilation Check Most Contractors Skip
Jacksonville attics fail in a pattern that has nothing to do with roof leaks. When soffit vents are blocked by insulation, or when there aren’t enough of them, the attic can’t pull outside air across the underside of the roof sheathing. The result is superheated, humid air trapped against the plywood, and that air condenses on the cool side of the sheathing at night. The first signs are subtle: mild discoloration on the plywood that looks like water staining but isn’t, a musty smell that comes and goes, or roof shingles that are curling prematurely over the hot spots. By the time dark mold is visible, the sheathing is usually soft enough to need replacement. Check this by counting your soffit vents from the outside and checking your ridge or roof vents from the attic side. If you can’t see daylight through at least half the soffit vents from the attic, insulation has drifted over them or they were never cut properly. A quick fix is to install plastic soffit baffles that hold insulation back from the vent openings. Proper Jacksonville attic ventilation is one square foot of vent area for every 150 square feet of attic floor space, and it should be split roughly evenly between intake at the eaves and exhaust at the ridge.
July & August: Humidity Peak and Hidden Mold Detection
August in Jacksonville means daily dew points in the mid-70s, afternoon thunderstorms, and outdoor humidity that makes a glass of ice water sweat in seconds. This is the month when hidden moisture problems declare themselves. The test below is simple and catches the two biggest ones: shower pan leaks and slab-adjacent pipe leaks.
The Bathroom and Kitchen Tile Test
- Press firmly on the tile grout in the shower floor. If the grout is soft, crumbly, or you can press a coin into it, water has been getting behind the tile. The grout itself failing is a minor issue. The water it admits is a wall cavity mold issue that can cost five figures to remediate if it sits through another August.
- Check the drywall directly below and behind the shower valve wall. Look for paint that’s bubbling, peeling, or showing faint tan or yellow patches. That’s the first sign of a slow shower line leak behind the wall.
- Check the base of kitchen sink cabinet. Run the sink for two minutes, then feel the cabinet floor for dampness. Compression fittings on supply lines and P-trap connections loosen slowly through thousands of heating and cooling cycles, and a slow drip here rots cabinet boxes and feeds mold in the wall behind. In Jacksonville kitchens we work on, the cabinet base under a sink is one of the most common surprise repair points when remodels begin.
Indoor Humidity Management
If your AC is running properly, indoor humidity should stay below 55 percent. Buy an inexpensive hygrometer and check it in the morning before the AC cycles hard. If you’re consistently seeing 60 percent or higher, the system is short-cycling or oversized for the house, and you’ll be fighting musty closets and sticky doors all summer. Run the bathroom exhaust fan for 20 minutes after every shower, and don’t set the thermostat below 72 during the day. Setting it colder makes the coil run colder, and that extracts less moisture from the air, not more.
September & October: Post-Storm Assessment and Exterior Caulk
September is peak hurricane month in Jacksonville, and October brings the first break in the heat with lower humidity. After any significant storm, do a damage walkthrough before the power is even back if it’s safe. Then, once the weather cools, tackle the caulk.
Post-Storm Assessment
- Walk the entire roof edge looking for lifted shingles, missing granules, or exposed nails. Wind from the northeast and east pulls at the fascia line first.
- Check the soffit and fascia for water stains. A stain that appears after a storm but not after a normal rain means wind-driven water found a small opening that needs sealing.
- Look at the exterior of the home’s air handler or condenser unit for debris impact or a tilting pad. A condenser that’s out of level can damage the compressor over time.
- Check all window sills for water beads. If water is beading on the inside of the glass, the window seal has failed and the window needs repair or replacement.
The Five Exterior Caulk Joints That Fail First in Jacksonville
Jacksonville’s UV intensity breaks down standard latex caulk in two to three summers. The joints that fail first are always the same five, and they’re the ones letting water into the wall cavity and the subfloor. The product matters more than the technique. Look for a hybrid elastomeric sealant like OSI Quad Max or a polyurethane caulk like Loctite PL S30. These stay flexible for more than a decade and expand and contract with the joint. They’re pricier than painter’s caulk, and they’re worth every dollar.
- The joint between the bottom of the exterior door threshold and the concrete or stone stoop. This joint is in direct sun and standing water and it fails every three to five years in Jacksonville.
- The joint where the window frame meets the stucco or siding. Look at the four corners of every window. A hairline gap in the top corner admits driving rain and runs it down the interior drywall.
- The joint where the hose bib or other wall penetrations pass through siding or stucco. The metal pipe expands at a different rate than the wall material, and the caulk ring breaks around the entire circumference.
- The joint between the fascia board and the gutter end caps. This one is often forgotten because it’s overhead, but water running back along the gutter will follow a cracked seal and sit on the fascia.
- The joint where exterior tub or shower fixtures meet the wall. On ground-floor bathrooms with exterior wall plumbing, this joint sees condensation and rain and fails on a predictable schedule.
November & December: The Cold-Weather Caulk Check and Winter Dry Air
November is the humidity break Jacksonville waits for. The air dries out, the afternoon highs drop into the 70s, and it’s comfortable enough to work outside for more than an hour. This is the best month for any exterior caulking you didn’t get to in October, and it’s the right time for the interior checks that dry air makes visible.
Cold-Weather Caulk and Seal Checklist
- Recheck every joint you caulked in October. A good elastomeric sealant takes 24 to 48 hours to fully cure, and a November rain will test it. Look for shrinking, bubbling, or pulling away from the walls.
- Check foundation vents if you have a crawl space. In older Jacksonville homes, foundation vents should be closed or partially closed in December to keep the floor warm and reduce cold air intrusion under the house.
- Inspect weatherstripping on the garage door. This is the largest unsealed opening in most homes. Replace the bottom seal if it’s stiff, cracked, or letting daylight in at the corners.
- Check for gaps around pipes under sinks. When the air dries out, the escutcheon plates and caulk rings around supply lines and drain pipes shrink and pull away. Seal these gaps to keep winter air and pests out of the cabinet and from there into the wall cavity.
The dry winter air is also the best time to evaluate any musty smell that appeared in summer and disappeared with the humidity drop. If a closet or bathroom smelled musty in August but is dry and neutral now, there’s a slow moisture source that’s active only in humid months. That’s usually condensation or a tiny leak that needs drying out, not remediation. But if the smell persists through winter, it’s an active leak inside the wall or under the slab, and you should call a professional rather than waiting for another summer.
Block Construction Inspection Points Unique to Jacksonville
Most homes built in Jacksonville after the 1960s are concrete block construction with a stucco finish. Block handles wind and termites well, but it has three failure modes that wood-frame homes don’t share: weep hole blockages, spalling stucco at grade, and efflorescence from trapped moisture. If you live in a block home, these three points belong on your checklist every 90 days.
Weep Holes
Weep holes are the small openings at the bottom of the exterior walls, usually spaced every 16 to 24 inches, sometimes filled with a piece of cotton rope or a plastic wick. They let water that condenses inside the wall cavity drain out and let air circulate behind the stucco. They also clog. Dirt, mulch, expanding spray foam from a previous owner, and even fire ants block them and trap water inside the wall. Check every weep hole twice a year: in spring after the pollen drop and in fall after the first summer of mowing. If you can’t see daylight through the opening or the wick is crusted with dirt, it’s blocked. Clear it gently with a small screwdriver or a piece of wire. Don’t seal them with caulk. A blocked weep hole is how a block wall in Jacksonville holds enough moisture to stain interior drywall and feed mold against the back of the drywall.
Spalling Stucco at Grade
When water wicks up from the soil or splashes against the base of a stucco wall year after year, the stucco begins to lose small pieces, usually within the first six inches of the ground. This is spalling, and it’s a sign of chronic moisture exposure. In Jacksonville’s rainy season, it worsens quickly. Catch it early and the fix is usually a masonry sealer applied at the base of the wall and a re-grade of the soil to direct water away. Let it go and the stucco loses structural bond and falls away in patches, exposing the block and inviting further water penetration. Check the base of your stucco walls after the first heavy rain in April and again after a September storm.
Efflorescence Patterns
Efflorescence is the white, chalky mineral deposit that appears on the face of block or stucco walls when water moves through the material and evaporates, leaving minerals behind. Not all efflorescence is concerning. Light, uniform efflorescence that appears in the dry season and washes off with a hose is normal. The pattern to watch for is the one that appears in a vertical band below a window, a roofline, or a plumbing penetration. That shape tells you where water is entering and tracking down inside the wall. If the efflorescence reappears after you clean it, water is still moving through that area and the entry point needs to be found and sealed.
What a Contractor Should Document on Every Visit
You can catch every problem early and still lose the value of the catch if you don’t document it. A dated record with photos, product names, and measurements is evidence for insurance claims, roof warranties, and resale disclosure forms. If a licensed contractor handles walkthroughs or repairs, that record should be part of the service. Here’s what a complete documentation packet includes.
- Dated photos of every area checked. Take wide shots first, then close-ups of anything questionable. Wide shots tell you where the problem is. Close-ups tell you how severe it is.
- The exact product name and color of any materials used. “Exterior caulk” is not enough. You want “OSI Quad Max, white, 9.5 oz tube” written down. If there’s a manufacturer warranty on the product, the product name is what activates it.
- Measurements of any crack, gap, or stain. A hairline crack that’s 1/16 inch wide today and 1/8 inch wide in six months tells a story. Without measurements, you’re guessing.
- The date the area was last serviced or replaced. This creates a replacement schedule you can actually plan around instead of reacting to failures.
- A note on any item that needs follow-up. If you’re watching a fascia joint, write down when you’ll check it again. A note that says “recheck in 6 months” is only useful if there’s a system to remember it.
At Elmstead Remodeling Jacksonville home, this documentation is part of how we work on every project and every maintenance visit. We’d rather hand you a dated record than a promise that we’ll remember next time.
Common Mistakes to Avoid
- Ignoring a damp spot because it “dries out in winter.” In Jacksonville, a spot that’s wet only in summer is condensation or a seasonal leak. It’s not a problem that’s gone away; it’s a problem that’s dormant. Dormant moisture sources are how mold gets a six-month head start.
- Sealing weep holes to keep bugs out. Weep holes are drainage points, not entry points. Sealing them with caulk or expanding foam traps water inside the block wall. Use a weep hole cover insert if bugs are a concern.
- Using painter’s caulk on exterior joints. Latex painter’s caulk is made to be painted over indoors. It fails in one Jacksonville summer and peels by the second. Use a hybrid or polyurethane sealant on exterior joints.
- Waiting until June to prep for hurricane season. June is when storms arrive, but May is when you can comfortably inspect and repair. By June, the heat makes attic work dangerous and roofing contractors are booked.
- Running the AC with a dirty filter to “save money.” A clogged filter does the opposite. It chokes airflow, freezes the coil, and forces the compressor to work harder. The filter costs $12. The compressor repair costs $1,800 or more.
- Assuming a roof leak is the cause of every ceiling stain. In Jacksonville, a ceiling stain below a bathroom is more often a shower pan leak or a supply line drip than a roof issue. Check the plumbing first before calling a roofer.
- Not photographing clean-up after a repair. The photo is your record that the space was left right. We take a clean-up photo before we leave every job in Jacksonville because it protects both of us and because it’s part of the Cedarwell Care Promise.
When to Call a Professional
Some maintenance items are DIY-friendly: clearing gutters, changing filters, caulking small exterior joints. Others are not. Call a professional if you find water coming through a ceiling or wall, a musty smell that persists through winter, a crack in the foundation wider than 1/8 inch, electrical issues of any kind, or a roof leak you can’t trace to a specific damaged shingle. Slab leak detection in Jacksonville requires specialized listening equipment, and opening a wall with hidden mold requires containment protocols. If you’re not sure whether a repair is simple or structural, General Contractor in Jacksonville is where we describe the free-estimate process. Elmstead Remodeling Jacksonville offers free estimates across Jacksonville, including Bathroom Remodeling in Jacksonville and Kitchen Remodeling in Jacksonville. Call (904) 643-6243.
Frequently Asked Questions
Most basic walkthrough inspections by our General Contractor services in Jacksonville are free when bundled with an estimate for repair work, and that’s how we handle it: when you call (904) 643-6243 to schedule a maintenance evaluation, the visit costs nothing, and you get a written price for any work needed before anything starts.
Start hurricane prep in May, not June. Jacksonville’s May weather is mild enough for attic inspections and exterior work, and contractors have open schedules before the June rush. By the first week of June, you want gutters clear, caulk joints sealed, and loose yard items secured.
Check for a musty smell that comes and goes with the weather, look for discoloration on roof sheathing visible from the attic side, and count your vents: you need roughly one square foot of vent area per 150 square feet of attic floor space, split between soffit intake and ridge or roof exhaust. If half your soffit vents are blocked by insulation, install baffles before next summer.
A maintenance issue stays on the surface: worn caulk, a clogged gutter, a rotting fascia board. A structural problem moves the framing or foundation: cracks wider than 1/8 inch, doors that suddenly won’t latch, floors that slope. If the issue affects how the house stands or sheds water, call a professional.
Not if you work with a contractor who gives a written price before any work begins. That’s how we operate in Jacksonville: the written price includes the scope, the materials, and the clean-up, and you approve it before a single tool comes off the truck. Call (904) 643-6243 for a free estimate.
Yes, when permits are required by Jacksonville code, we pull them and schedule the inspections. Most caulking, gutter clearing, and ventilation cleaning needs no permit, but structural repairs, water heater replacements, and some roof work do. We’ll tell you which one applies before work starts.
The Bottom Line
Jacksonville homes don’t fail suddenly. They fail quietly, in the weeping stucco at grade, the blocked soffit vent, the caulk joint that gave up three summers ago, and the shower pan drip that’s been feeding mold behind the tile since last August. A maintenance checklist built for this climate, followed every 90 days and documented with photos and product names, catches most of these before they cost real money. The remaining 20 percent of catches need experienced eyes and sometimes specialized equipment, and for those, a free estimate from a Jacksonville contractor is the right call. Walk the house, write down what you find, date the photos, and when something exceeds the checklist’s reach, see our How to Hire a Construction Contractor in Jacksonville: A Step-by-Step Guide or pick up the phone.
Written by Graham Stein, Owner at Elmstead Remodeling Jacksonville, serving Jacksonville since 2005. Explore more guides & resources on our blog.
See the difference
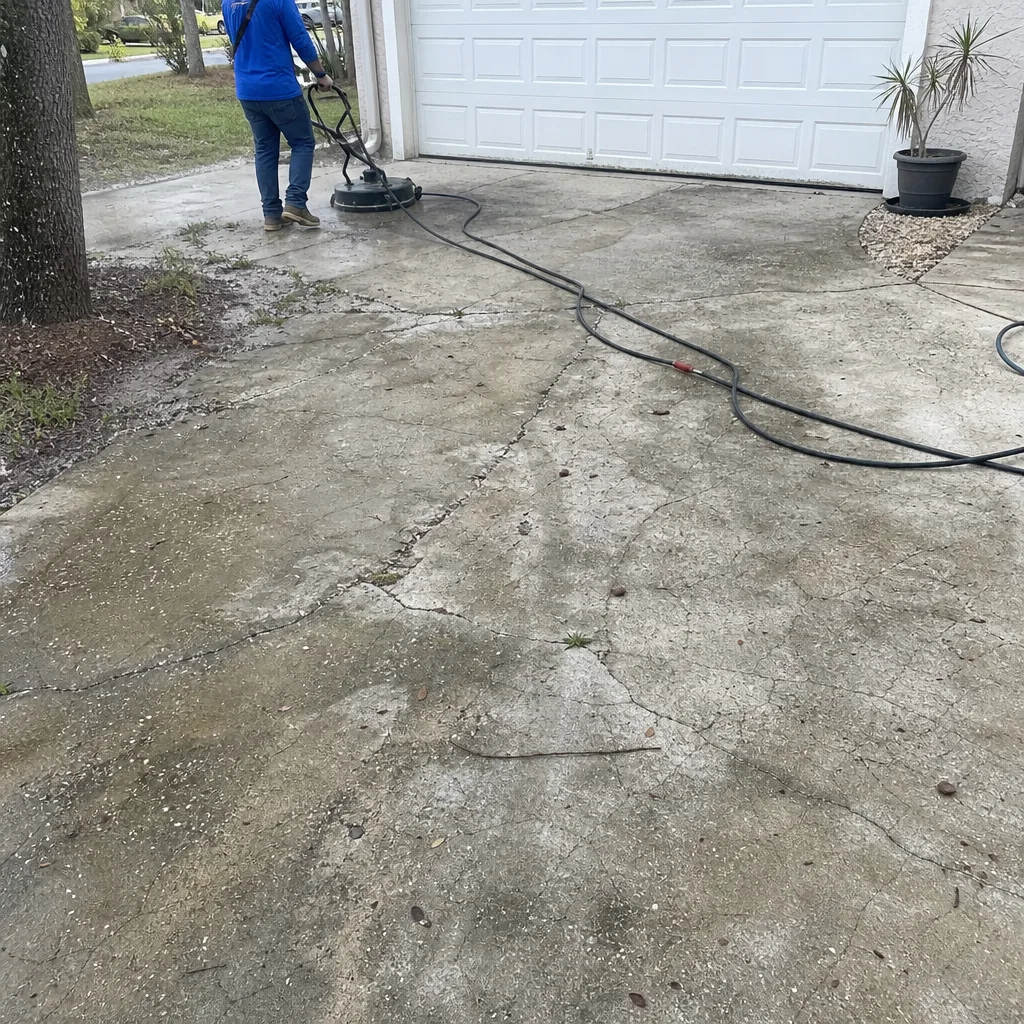 Before
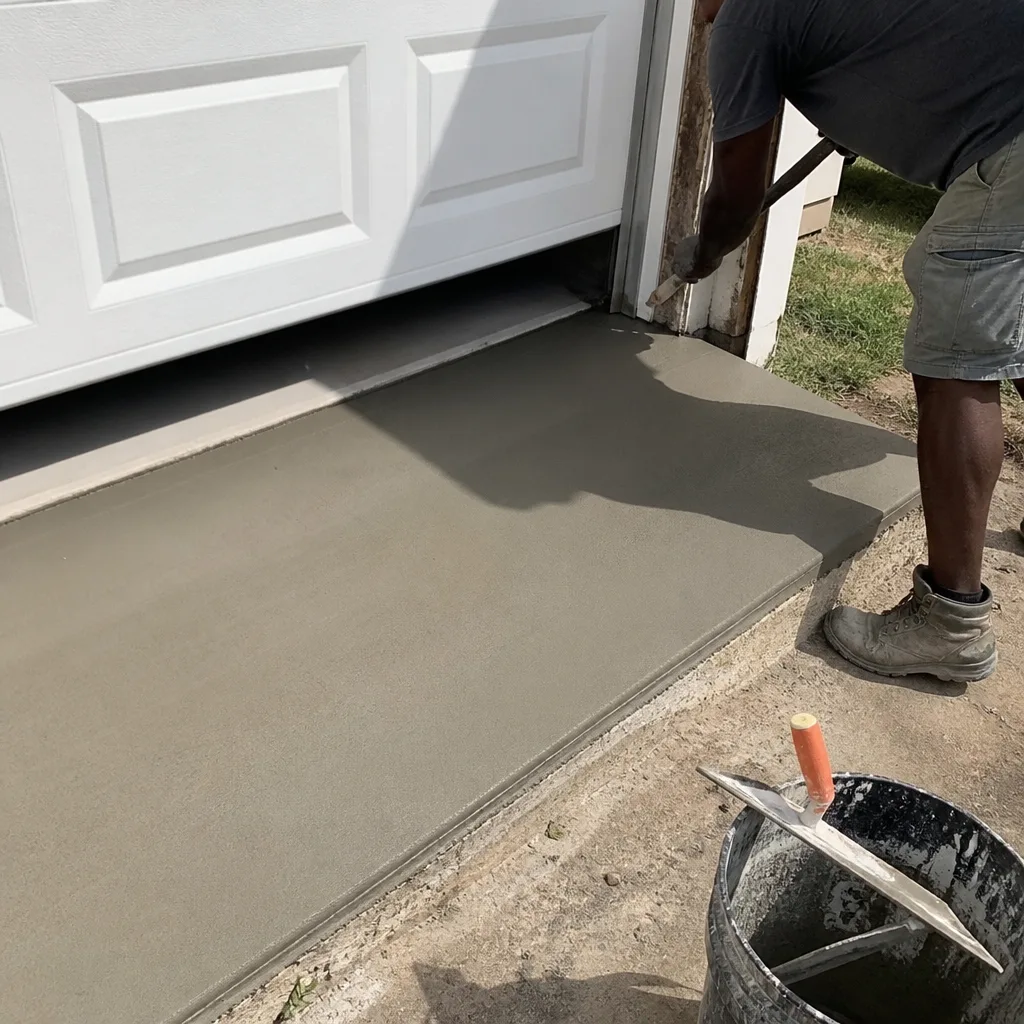 After
After Before
 After
After Before
 After
After